Showing posts with label Installation and Configuration. Show all posts

Monday, March 18, 2013


Run Unix Commands on Windows                                    Grub Boot Loader

People always complain that there are not enough softwares available in Linux/Unix which we require for daily life but it is not true. There are enough softwares  available in Unix and all these softwares are open source. We can easily download and install it and suppose, in Linux repository, we couldn’t find the required package then install windows software on Linux that will be the best way. So, we are going to understand how to install wine application which is creating windows like environment on Unix for windows applications.
Wine is the package which used for creating environment of Windows on Linux. It is open source package. 
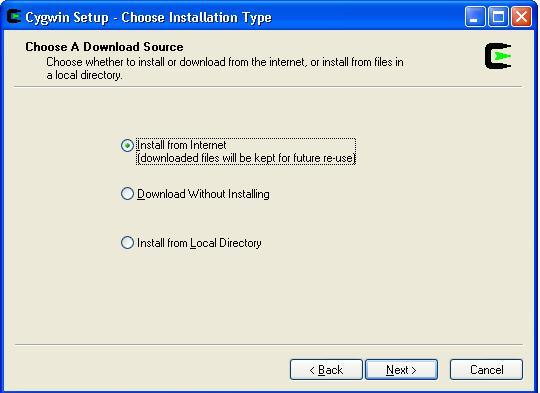
Installation and configuration of wine is quite easy. you can download winehq from here.

Features of Wine

·         Wine allows you to run many Windows programs on Linux.
·         If we are using latest version of Wine then we can get assistance from winehq channel on irc.freenode.net.
If you need complete installation of Windows then you can look for Qemu as well. It is also an open source application.

Install Wine on Ubuntu Server

Let’s install wine on Ubuntu server first:
It is very easy to install Wine on Ubuntu Server. Need to follow below steps to install it :

Step 1: Run below command to update repository.

sudo add-apt-repository ppa:ubuntu-wine/ppa

This PPA can be added to your system manually by copying the lines below and adding them to your system's software sources. For each Ubuntu server it will change if you are installing it on Quantal 12.10 Ubuntu then following lines will be added in your system’s software sources:


These lines will be different as per your version of OS.

Step 2: update APT package information by running.

sudo apt-get update

Step 3  : We can now install Wine directly. Run below command.

sudo apt-get install wine1.5

Wine is installed on Ubuntu. Please check for application, it will come in list.

Configuration of Wine in Ubuntu

Before using Wine, we need to configure it. It needs fake c: drive where windows application will be installed. To create fake drive, run following command.

winecfg

We have another method as well to do this by going to Applicationsà Accessories Ã  Terminal
We have configure wine option in the Applications Ã  Wine menu
The above command will create a hidden folder for wine  in home directory of current user. Once directory created then wine configuration window will appear and customize settings as you need.  If you want change the application specific changes then also run above command. Pop will come for menus and then click on Add application and navigate to where exe resides and then select it. Change the settings as per your requirement.

Install windows application in Wine

Now it is time to install windows application in Wine.
Step 1: Download the exe or any kind of installable file of windows for the application.
Step 2: Save at somewhere and cd to that directory through terminal.
Step 3: Type as follow:

                Wine name-of-application.(extension)                                  e.g.  wine vlc.exe

While installation, if application asks for directory to save files then select C: drive. (We already created C: drive). Whenever you want to run this application then go to that directory and above command or go to wine browser and double click on launch icon it will start that application.

Uninstall Wine

If you want to uninstall the wine then run following command it will uninstall it. Run terminal and run command.

wine uninstaller


Posted by Machindra Dharmadhikari On 3/18/2013 12:55:00 AM 3 comments READ FULL POST

Wednesday, December 19, 2012

Recover deleted files in Linux                                    10 steps to create Logical Volume


Cygwin is the best application which creates unix like environment in Windows OS. We can run almost all commands on Cygwin. Processing of files in windows will be easy if we use unix commands to process.

You can use openssh server in cygwin and create password less connection as well. There are many features of Cygwin that we will discuss in other article.

Please see below  for  brief information about installation of cygwin.

How to install cygwin ?
1.        It is very easy step. Go to this link Download Cygwin
2.       Download setup.exe only.
3.       Run the setup.exe and you can see first pop up as follows:


Click here to know more about: Jstat Command in Linux


4.       Select Install from Local directory, if you have already downloaded all packages otherwise select first option i.e. Install from Internet and click next.
 
5.       After that you will get next window where setup is asking for root directory if you have selected the Install from local directory. Otherwise give the path where you want to keep all cygwin related files and then click on next.
 

6.       Now it will ask for Internet settings if you have i.e. for proxy settings if you have. Otherwise select Direct Connection option.
 
7.       Now you will get mirror list. Select any mirror and click on next.
 
8.       It is the last step and most important step about Cygwin installation. Please be careful while selecting the packages which you need with cygwin. If you have not selected respective package then you will not get the commands of that package in your cygwin and you will get error message like "Command not found". If you are going to select all packages then Cygwin will take too much time to complete and you will install unnecessary packages as well.
 

After selection of packages, installation process will start. click on next and then finish. 
and then you will get the desktop icon for Cygwin Launch. Double click on this and Cygwin will start  and start to run unix commands on Windows
 

If you need any help regarding Cygwin then you can reach me on linuxconcepts@gmail.com.


FTP server Concept                  Bash Shell features                      File System in Linux


Posted by Machindra Dharmadhikari On 12/19/2012 06:38:00 PM 3 comments READ FULL POST

Thursday, November 1, 2012

Logical Volume Manager in Linux                                      Check CPU usage in Linux


Recently, ubuntu 12.10 Quantal Quetzal released and users are ready to use new features of ubuntu 12.10. This version is available for Desktop, Server, cloud and core products. It introduced new innovation that bring together desktop and cloud based experiences. In this release, new Web apps features also introduced.
Features of Ubuntu 12.10:
·         Ubuntu 12.10 web apps
If you are using web apps like Facebook, Twitter, You tube, Gmail, Flickr then no need to open it every time from Firefox or any browser.  Install the web app for respective site and put it on desktop.
·         Online Search –
The Dash always searches the files, folders, photos of your computer. Now, it searches your online account also.
·         Compatible –
Most important compatibility is with Windows. Now, you can open, edit, share Microsoft office documents easily.
·         Speed –
Ubuntu 12.10 is very fast while booting. It loads quickly as compared to other OS.
·         Automatic Security updates—
In Ubuntu 12.10, automation of security updates provided.

There are many features like File encryption, Password Protection has been provided in this release.
·         LibreOffice –
This office has been updated to 3.6.2. There is no need of separate plugin.
·         Firefox –
Firefox updated up to its latest version i.e. 16.
·         Secure Boot support—
Used Grub2 boot loader.

There are more ubuntu 12.10 features, you can read on ubnutu's authorized site.


4 steps to extend the logical volume                             Difference between $* and $@ in scripting
Posted by Machindra Dharmadhikari On 11/01/2012 05:16:00 PM No comments READ FULL POST

Friday, September 7, 2012

What is FTP Server?
FTP is a standard network protocol used to transfer files from one host to another host over a TCP-based network, such as internet. FTP is a built on Client-Server architecture and utilizes separate connections between the client and server. FTP users may authenticate themselves using a clear-text sign-in protocol but can connect anonymously if the server is configured to allow it.
In Linux, you can access FTP from command line Interface mode as well as GUI. FTP server uses two ports for the data transfer and one of them used for commands and other for sending and receiving data.
In Linux, Security concerns are strictly considered and for this purpose there are many services are disabled. So, we need to enable some of them options which are related to FTP server on both side i.e. Client as well as Server side. In Firewall also, need to allow some of the connections on both side. Although, a client's computer may not have a firewall enabled, but server should always have enabled with maximum security.
If you want to connect ftp server then there are two types of modes as follows:
1.       Active FTP
2.       Passive FTP
Active FTP:
                In Active FTP mode, Command connection is initiated by the client and the data connection is enabled by Server. In this, Server is actively establishes connection with the client due to this known as Active Connection. The Client opens up a port higher than 1024, and through it connects to the port 21 or command port of the server. Then, the server opens up its port 20 and establishes a data connection to a port higher than 1024 of the client. In this mode, client must enable the incoming connections for that port to receive data at the opened port.


Passive Mode:
                In this mode, Server acts entirely as passive that's why it is known as passive mode. Client establishes both the connections i.e. command and data connection. In this mode, Server listen the incoming requests on port 21 and when request is received for a data connection from the client using a high port, server opens up the high port for data connection. Then client initiates data connection between its high port and server opened port. In this mode, Client needs to check its firewall settings of outgoing connections and at server side need to check incoming connections.
Difference between Active and Passive Mode:
1.       In Active mode, Server initiates the data connection but in passive mode Server acts as a passive. It is not initiating any connection.
2.       Port used for data connection it changed in passive connection. In active data connection establishes between high port to port 20. And in Passive mode, data connection establishes between High port to high port.
3.       Firewall settings need to check in client as well as server side to establish data connection.
by Machindra Dharmadhikari
Posted by Machindra Dharmadhikari On 9/07/2012 09:54:00 PM 1 comment READ FULL POST
  • RSS
  • Delicious
  • Digg
  • Facebook
  • Twitter
  • Linkedin
  • Youtube

    Chitika Ads 2

    Histat

    About

    Enter your email address:

    Delivered by FeedBurner